
Power Supply Conversion & Repair
By Jason Griffiths
I have always been after an Apple III to add to my collection - Problem was trying to find one in Australia was next to impossible, I had only ever seen three in the country and 2 of those were at the last OzKfest and of those, only one of those worked.
That left finding one on ebay and getting it shipped from the US. Decent units were going for over $1000 and trying to get it shipped to Australia was also problematic and costly. Well after what felt like years, numerous watch lists and getting outbid on various auctions I finally found one. It was faulty - The seller only had (1) feedback but I took the plunge anyway. You can read the auction description here.
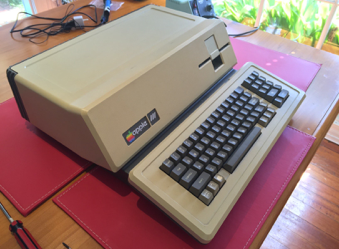
The seller believed the power supply had blown, and I tended to agree this was most likely that cause. As I was going to have to replace the internals to work on 240v, I was happy enough to take that risk.
What seems to be a bit of a pattern with my projects, I received shipment of my Apple III, checked the contents and sat it with the rest of my retro computers waiting. Well I wait no longer, the looming OzKfest 2015 has motivated me to have a look at it and see if I can get it going for the event.
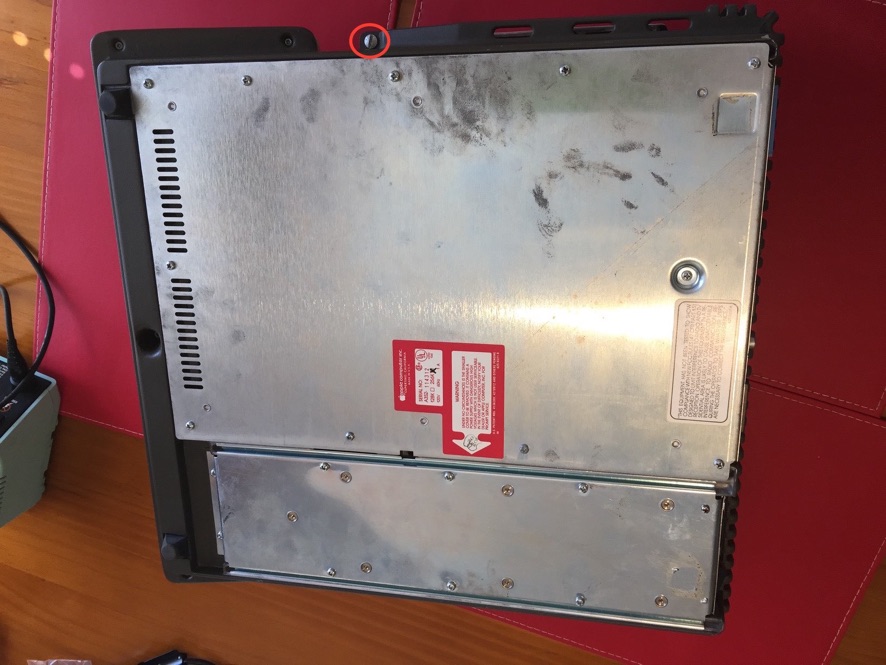
Getting to the power supply is fairly straight forward, but first I decided to take it apart and check over the rest of the unit as well. You take the top cover off by turning 2 flathead screws 90º on the underside of the Apple III, one on each side.
After that you can pop the hood and you have access to the expansion slots - but that’s no fun - where is the rest of the logic board? Time to flip it over and remove some more screws.
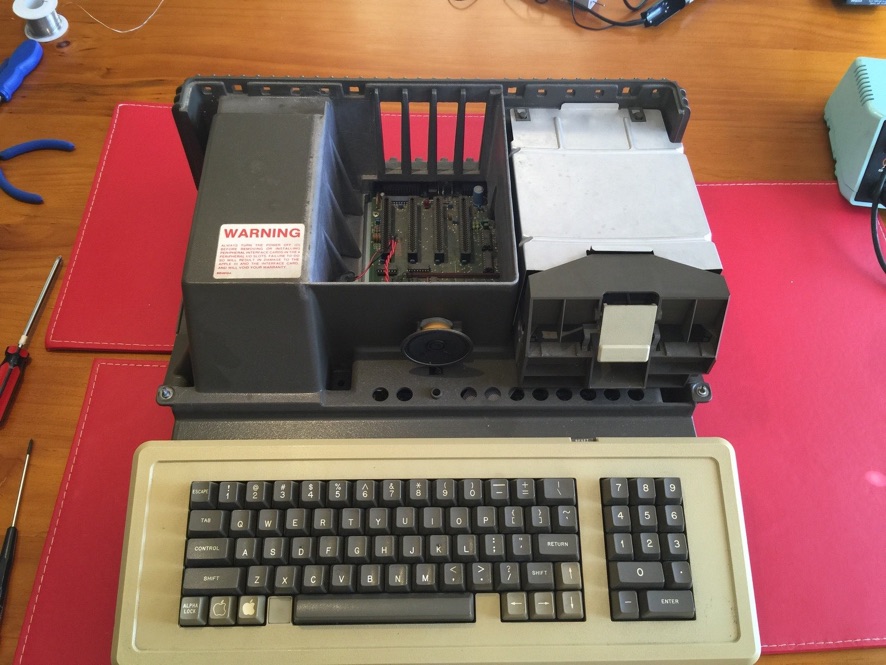
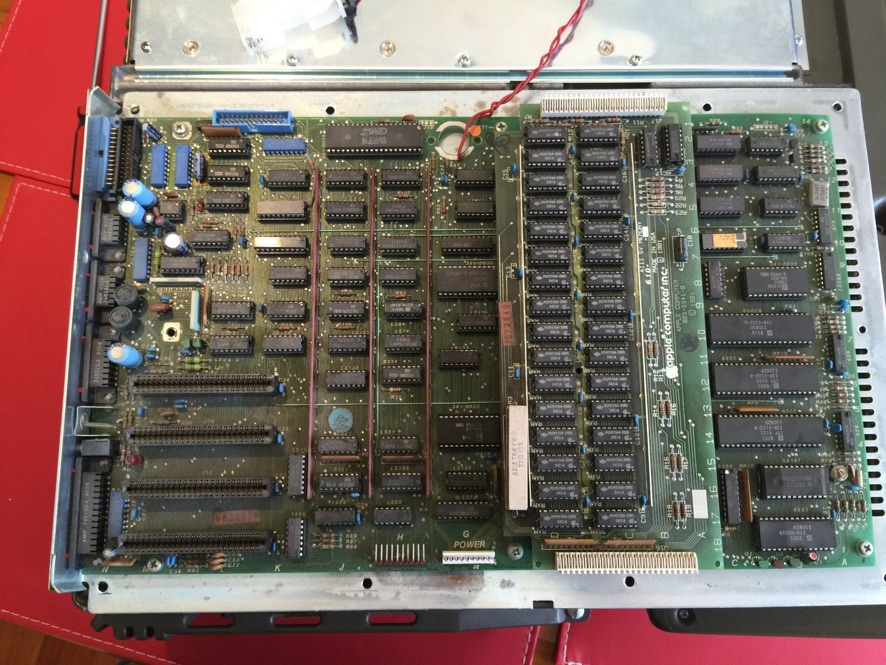
That’s better - A close inspection and I couldn’t see any visible damage to the logic board - Time to move on to the power supply - NOTE the power supply contains HIGH VOLTAGE - make sure it is unplugged before working on it. Even unplugged, the capacitors on the power supply can store a charge for some time.
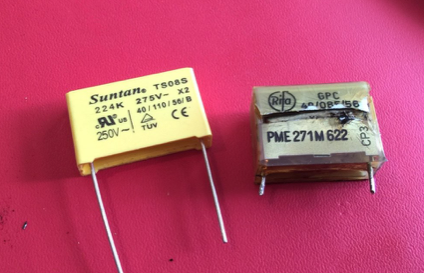
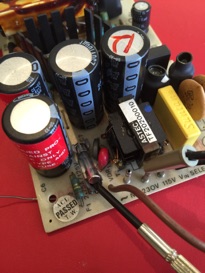
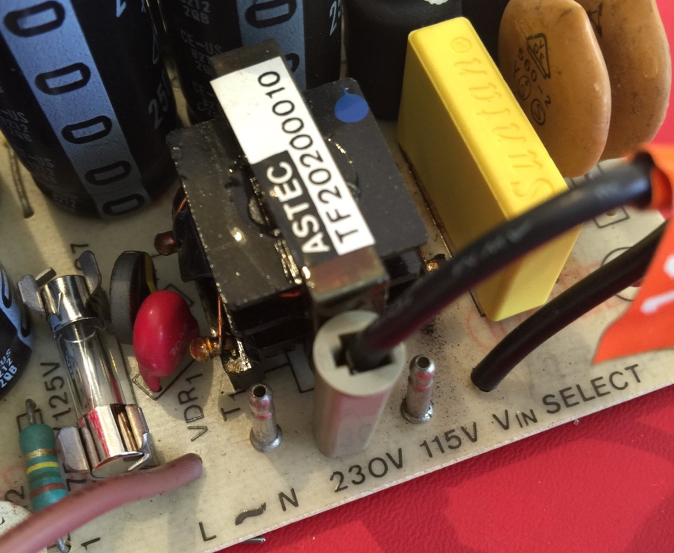
On getting to the power supply I found a couple of cool things - first item of interest is the large yellow filter capacitor below on the right - it was clearly cracked right open and I had seen these capacitors cause large amounts of smoke in the past. The second more exciting thing I saw was the power supply had a 115v/230v jumper. Was it possible that with 1 new cap and a jumper change I could be up and running?

Other than the large filter capacitor, the rest of the capacitors looked fine, no swelling or cracking to be seen, so off to Jaycar I went to get a replacement capacitor. Also, I realised that the 125v fuse would need replacing so it got replaced with a 240v 2A fuse at the same time. With the recent news of Radio Shack in the US closing many stores, I couldn’t help but feel lucky we still have stores like Jaycar and Altronics in Australia. I better keep buying from them whenever possible so they don’t suffer the same fate.
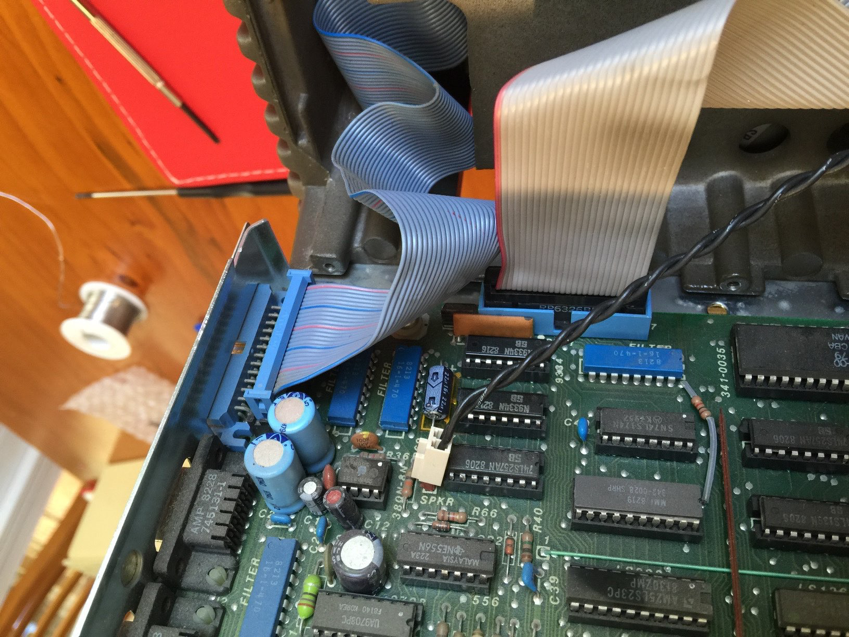
Time to re-assemble. Take note the floppy drive and keyboard connectors are the same size. The blue floppy connector plugs into the black socket closest to the external floppy connector and the black keyboard connector plugs into the blue socket on the edge board. Why Apple did blue to black and black to blue I’ll never know but thats how it is, at least on this Apple III.
Okay, time for the MOST IMPORTANT STEP. After replacing the capacitor and fuse, it is very import to change the voltage jumper to 230v to match Australian power. Failing to do this would no doubt cause major damage.
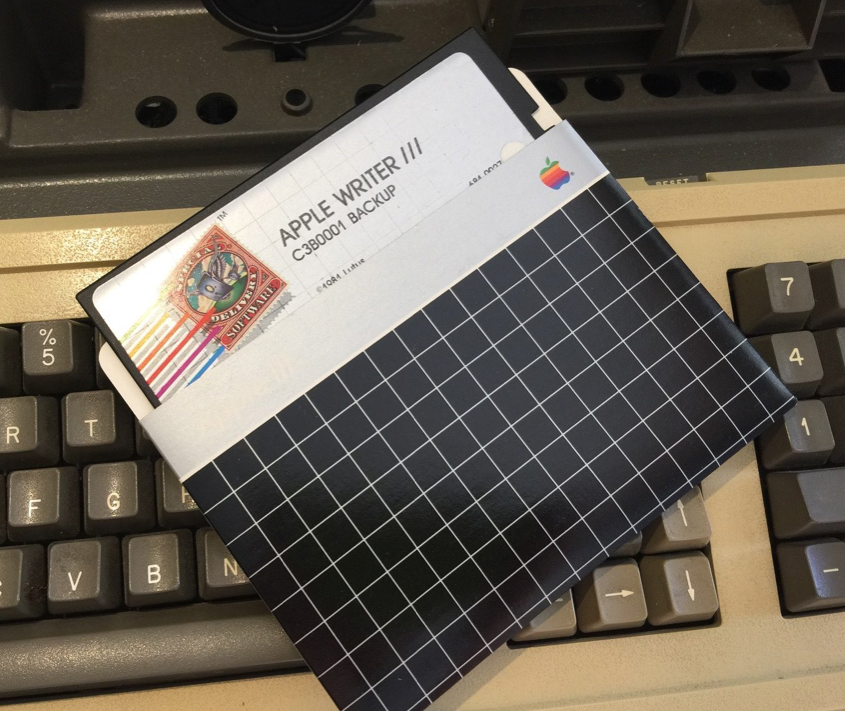
Testing, luckily the Apple III came with some original software so I didn’t have to mess around trying to find something to boot. I will admit I was a little nervous plugging it in for the first time as I wasn’t 100% sure if it would work or not, but...
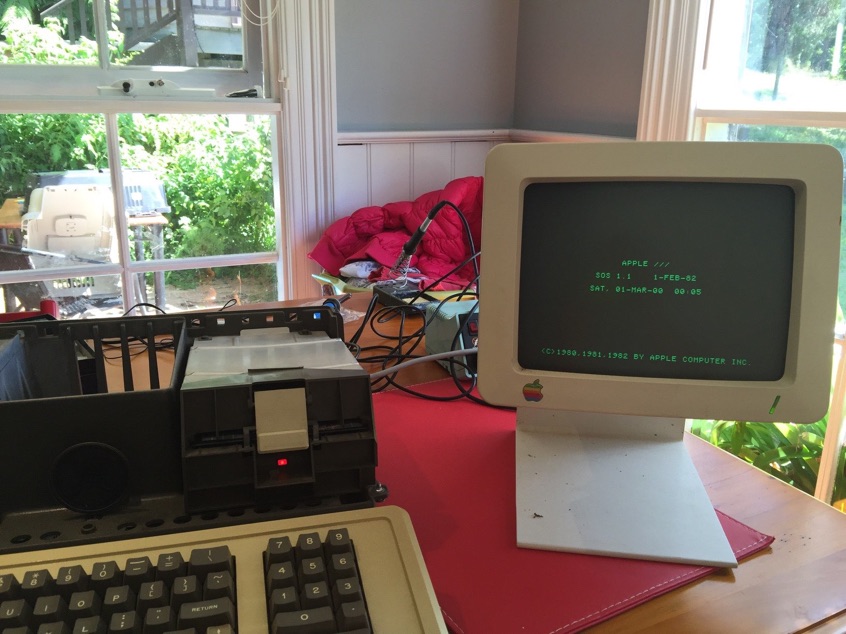
Success, the Apple III drive chugged and whirred and I was greeted with the Apple III SOS boot screen followed by Apple Writer. I was over the moon. Not sure what I will do with it next but I now have a 240v fully functional Apple III in my collection.
